If you are reading this, you probably love history and archaeology. And if you have children, then you have probably struggled at times to excite them about ancient ruins and archaeology. Here is an idea: let them be an archaeologist and see how interesting (and yes, even exciting) it is!
The friendly people at Greecs.com sent us an archaeology kit for children to try out. We received the “Gods and Heroes” kit (€37.00), in which you “excavate” a broken black-figure pottery image and piece it back together like an archaeologist would. Exciting!
Kit Contents
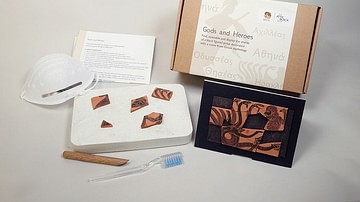
The kit arrived in a quite sturdy cardboard box, which contains:
- Slab of plaster mixed with earthen materials and several decorated black-figure pottery shards hidden inside
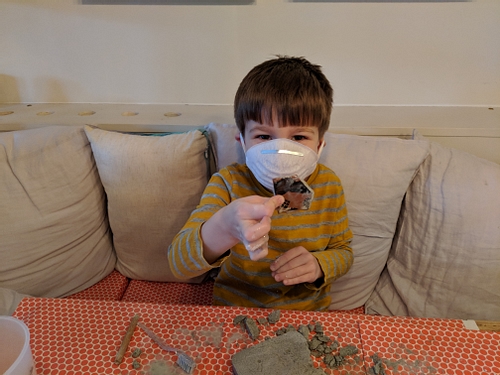
- Protective dust mask (this definitely won the kid over and made it more exciting!)
- Wooden digging tool
- Toothbrush (for cleaning the shards)
- Magnetic self-adhesive board for mounting the assembled piece of pottery (the adhesive does not really work though)
- Cardboard mount to display the assembled pottery picture
In addition, you will also need:
- Plastic tablecloth or other water-resistant cover to protect your table from the mess
- Large bowl of water (to soak and wash pottery shards)
Finding the Shards
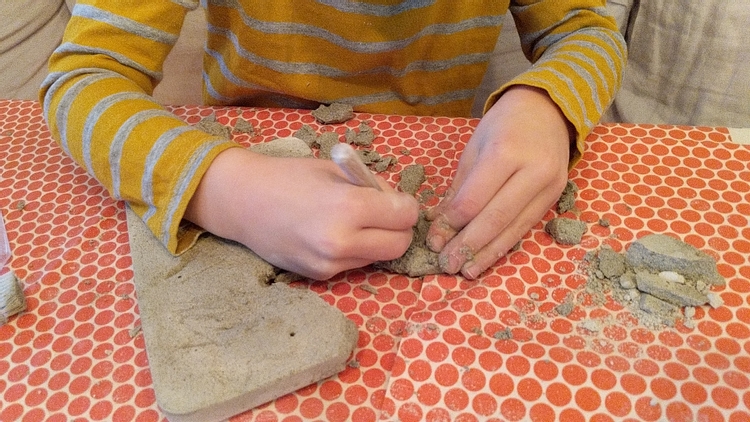
That's it! We are set and ready to become archaeologists. My "test subject" was a five year-old kid, who started straight away scratching at the dry plasterboard with the wooden tool, which was quite ineffective. The plaster is too hard; he only managed to draw on it.
We then poured some water over the plaster, which immediately made it much easier to break apart. A few minutes later, he discovered the first shard of pottery, which was very exciting!
Cleaning the Shards
There was still quite a lot of plaster caked around it, so we soaked it in water for a few minutes, and he then attacked it with a combination of the wooden digging tool and the toothbrush. After a few minutes, we had a reasonably clean shard of pottery.
We found the next shards quite quickly and repeated the process of soaking it in water and using the toothbrush to clean it. The excitement stayed, and we wondered what picture it might become. Sometimes the caked plaster was a bit hard to get off the shards, so I helped.
Completing The Puzzle
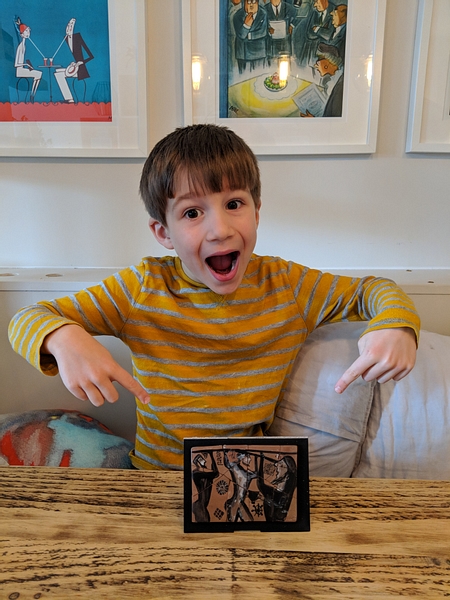
Putting the shards together into a complete painting was a real puzzle, but lots of fun. There is a photo of the final image in the box, so you can use that as a guide if it is too difficult. We thought we had uncovered all of the pieces, but we quickly noticed that two shards were still missing (the kit does not tell you how many shards are in the plaster). We carefully went through the remains of the plaster and found the two small shards. It is a good idea to keep the plaster on the table until you are sure you have got all the pieces.
There is a magnetic sticker in the kit, which is supposed to hold the shards in place. For us, the glue was not strong enough and various shards kept falling off. We resorted to glueing them together so that the image would remain intact. He placed it on the windowsill in his room, and he is very proud of it!
Final Thoughts
This is a great experience, for both adults and children. We had a great time, and I would highly recommend this kit.
I could also imagine an educational use for the kit. You can easily busy three children with one kit so that they can be archaeologists together and help each other. This could work really well in a small class or homeschooling environment.
Archaeology Kit
Gods and Heroes
€37.00 on Greecs.com


