The Battle of Lundy's Lane (25 July 1814) was one of the bloodiest battles of the War of 1812. Fought near the location of present-day Niagara Falls, it saw a US army under Jacob Brown clash with a British force under Gordon Drummond. Although the battle was inconclusive, it rendered the Americans incapable of continuing their invasion of Canada.

Background: The Americans Invade Niagara
On 3 July 1814, the United States launched its final largescale invasion of British Canada. Led by Major General Jacob Brown, an army of 3,600 US soldiers, state militiamen, and Seneca warriors crossed the Niagara River to assault Fort Erie, a British stronghold located on the Niagara Peninsula. The British garrison, outnumbered and taken by surprise, quickly surrendered, giving the Americans control of the fort. The next day, one of Brown's subordinates, Brigadier General Winfield Scott, led his brigade north in an attempt to push back the forward elements of the Right Division of the British Army, which had been left to defend the peninsula. The British had a little less than 2,000 men – 1,350 regulars, 350 Native American warriors, and 200 Canadian militiamen – but their commander, Major General Phineas Riall, believed that his men would make up in training and discipline what they lacked in numbers. Therefore, instead of pulling back in the face of Scott's advance, Riall dug in at Chippawa Creek, guarding the one bridge over the creek.
On 5 July, the Americans and British clashed at the Battle of Chippawa. Initially, the fortunes of battle swung in favor of the British. Advancing through the woods, the scarlet-coated regulars managed to scatter the American pickets and push back the undisciplined state militiamen without much of an issue. But then, they came face to face with General Scott's brigade of gray-clad US regulars. For the past several months, Scott had been tirelessly drilling his troops at their camp outside Buffalo, New York; these drills would last anywhere between seven and ten hours a day, with inspections and parade marches taking place weekly. As a result, Scott's soldiers were much more disciplined than the half-trained US troops the British had been used to fighting in earlier battles. The British officers watched with bewilderment as Scott's men loaded their muskets and fired in unison, unwavering under fire. Upon realizing that these were regulars, Riall marched his own best troops out to face them. For 20 minutes, the American and British regulars stood their ground, exchanging deadly volleys, until at last the redcoats broke and fled.
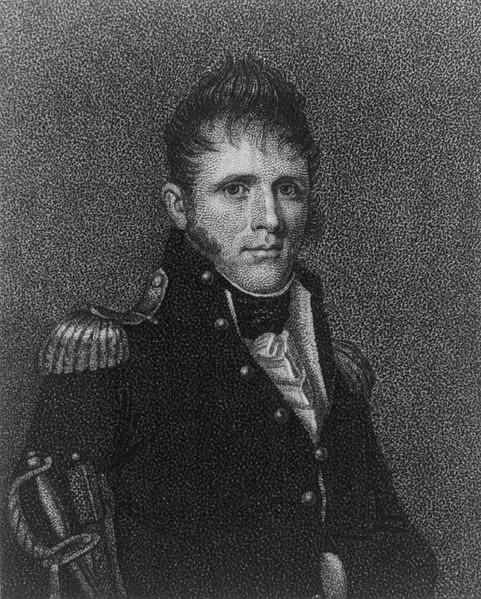
A few days after the battle, Riall withdrew north along the Niagara River, eventually making his way to Fort George on Lake Ontario. This frustrated Brown, who lacked the manpower and heavy artillery necessary to take the fort. Instead of pursuing, Brown moved his army to Queenston, a settlement seven miles (11 km) south of Fort George and the site of the first attempted American invasion of Niagara two years earlier. Here, Brown decided to wait for assistance from Commodore Isaac Chauncey, who commanded the US fleet on Lake Ontario; his hope was that Chauncey could ferry supplies and reinforcements to the army at Queenston, and perhaps even aid in the eventual attack on Fort George. But Chauncey, prickly as he was, had no intention to play second fiddle. In the commodore's view, the US ships on Lake Ontario had become subservient to the needs of the army and were being used only as glorified transport vessels, which he felt injured the honor of the navy. This was mostly a problem of Chauncey's own making; he could sail out and challenge the British ships on the lake to a battle anytime he wanted but preferred instead to procrastinate in Sackets Harbor, wasting more time and money building unnecessary ships.
Raids & Skirmishes
With Chauncey refusing to do the army's bidding, Brown was essentially left to his own devices. On 9 July, hoping to reconnoiter the countryside, he sent out parties of scouts, including the Irish-Canadian defector Joseph Willcocks and his company of Canadian Volunteers. Willcocks and his men ignored Brown's instructions to not destroy private property and went on a pillaging spree, raiding the homes and farms of their former countrymen. Willcocks' men, according to one eyewitness, spent their time "plundering every house they could get at; they even plundered women of everything they had" (quoted in Taylor, 390). This turned many of the locals against the Americans, some of whom began feeding information to the British troops and Canadian militias. Captain William Hamilton Merritt, the dashing young commander of the Canadian provincial dragoons, rode out to defend the countryside and skirmished several times with Willcocks' men. This was a peculiar match-up since Merritt, fighting for the Canadians, had been born in the US, while Willcocks, fighting for the Americans, had served in the Parliament of Upper Canada only a few years before.

In the coming days, the skirmishing began to take the shape of guerilla warfare. Canadian militia ambushed an American wagon train that was bringing supplies to Queenston. On 12 July, US militia General John Swift was shot "through the breast" and killed by a Canadian militiaman who was pretending to surrender. And, on 20 July, eight Canadians were executed at Ancaster, having been convicted of high treason. After having been hanged, their heads were cut off and paraded through the nearby towns, as a warning to any other Canadians who may have been tempted to aid the Americans. In retaliation for these acts, US militiamen under the command of Lt. Colonel Isaac W. Stone raided the Canadian settlement of St. Davids, torching 14 houses, two shops, and one mill. Although Brown dismissed Stone from the army for disobeying orders, he could not wash out the damage that this raid and others like it were doing to the Americans' reputation.
Prelude to the Battle
By mid-July, as the fields of Niagara were watered with the blood of the militiamen, Brown finally decided to stop waiting and take action without Chauncey's fleet. On the advice of his aggressive subordinates – Scott's voice loudest of them all – Brown moved out of Queenston on 20 July, marching his army up to Fort George. But when they arrived, they found that Riall had been reinforced – British Lt. Colonel Joseph Wanton Morrison, the victor of last November's Battle of Crysler's Farm, had arrived with the veteran 89th Regiment. This brought the number of British troops at Fort George up to 3,500, meaning that they now outnumbered the 2,600 battle-ready Americans in Brown's army. What was more, Lt. General Gordon Drummond, the Lieutenant Governor of Upper Canada, was on his way from York to take command of the British army himself. Faced with these factors, Brown decided it was best to disengage. On 24 July, he withdrew his army back to Chippawa, where he hoped to gather supplies and reinforcements before attempting to bypass Fort George and push up the peninsula toward the strong defensive position at Burlington Heights.

Early on the morning of 25 July, Drummond arrived at Fort George and immediately ordered a detachment of British troops to advance toward the American camp, hoping to push them back down the peninsula. Upon learning that these British troops were on their way, Brown broke camp and began marching north, with the goal of forcing the British to withdraw in order to defend Fort George. The Americans, advancing along the Portage Road, were now headed straight toward Lundy's Lane, an offshoot of the main road that was being held by another force of British troops. General Riall, now relegated to second-in-command, panicked and ordered that these men be withdrawn; Drummond, however, quickly countermanded that order and sent more men to Lundy's Lane, determined to hold the position. It was here that the fate of the Niagara Peninsula – and indeed, of all Canada – would soon be decided.
Battle
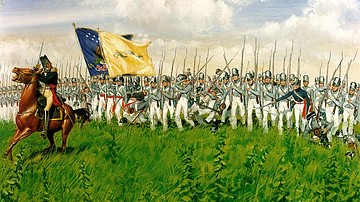
Lundy's Lane was situated on a rise 25 feet (7.5 m) higher than the surrounding terrain. By the late afternoon, Riall was in command of approximately 2,000 men along the road, with Drummond on his way from Fort George with 800 reinforcements. On another small hill along the road sat six British artillery pieces, including a Congreve rocket, which were nestled amongst the gravestones of a cemetery. This was the situation at 6 p.m., when the first elements of the American army marched into view. These were Scott's men, still buoyed by their victory at Chippawa and undaunted by the strong British position atop Lundy's Lane. Lining his 1,200 regulars up in a wooded area, Scott briefly took the measure of the enemy before sending a messenger back to Brown to urge that the rest of the army come up with all speed. As for Scott, he was not one to waste momentum by dithering; at 7:15 p.m., without waiting for Brown to arrive with reinforcements, he gave the order to attack.
Scott's men emerged from the safety of the woods onto the open field before the road. Soon, the British cannons on the cemetery hill roared to life, tearing holes in Scott's gray line as it advanced steadily across the field. It was not long before even the reckless Scott realized he had bitten off more than he could chew – as his main body of troops became bogged down by enemy fire, he sent a single regiment under Major Thomas Sidney Jesup to go into the thick woods on their left and try to find a way to outflank the British position. Jesup discovered a narrow trail through the woods and followed it until he came out on the British right flank. With a yell, his troops charged into the Canadian militia posted on this flank, startling them and driving them off. Hoping to capitalize on this success, Jesup sent a detachment of light infantry under Captain Ketcham to seize the juncture between Lundy's Lane and the Portage Road; in the process of doing this, Ketcham took many prisoners, including Captain Merritt, the dragoon leader who had skirmished with Willcocks. Another of Ketcham's prisoners was none other than Riall himself, who had been wounded in the arm and mistook the American troops for his own men. When Riall learned the name of the man who had captured him, he could not help but laugh at the pun: "Captain Ketcham! Ketcham! Well, you have caught us, sure enough" (quoted in Berton, 721).

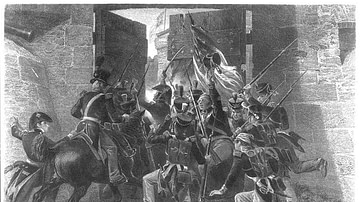
By now, Drummond had arrived on the field with his 800 reinforcements. Realizing that his right flank had been compromised, he decided to realign his troops, pulling his flanks back to better protect his center. This move, however, left the British artillery exposed, which General Brown did not fail to notice when he, too, arrived on the battlefield shortly after dusk. Brown approached Colonel James Miller, whose regiment had not yet been committed to the battle, and asked if his men could storm the hill and seize the enemy cannons. "I'll try, sir," replied Miller, a humble response that would soon become a famous rallying cry in the US Army. Guided only by the faint light of a pale moon, Miller's men advanced within mere yards of the British cannons. They unleashed a single musket volley before charging, bayonets fixed; those British gunners who had not been killed or wounded fled, leaving the cannons in Miller's hands. For the next two hours, the British soldiers would try to retake the cannons, leading to a bloody hand-to-hand fight amongst the gravestones, a struggle that one of Miller's officers would later call "a desperation bordering on madness" (quoted in Berton, 723). Miller was soon reinforced by Brigadier General Eleazer Wheelock Ripley's brigade, intensifying the action as nightfall consumed the field in darkness. Historian Pierre Berton illustrates the chaos of the battle:
It is ten o'clock. The moon is down…seldom more than twenty yards apart, the opposing lines occasionally glimpse the faces of their enemies and the buttons on their coats in the flash of the exploding muskets. Drummond, cold as ice, refuses to give an inch. Ripley's men…can hear the British commander's rallying cry: 'Stick to them, my brave fellows!' Ripley orders his men to hold their fire until their bayonets touch those of their opponents, so that they can use the musket flashes to take aim.
(723-24).
Amidst the darkness and smoke, the confusion only worsened. A Royal Scots regiment, spooked by the emergence of a Canadian militia unit from the trees, fired a devastating volley into them, while the British 103rd Regiment accidentally walked right up to the center of the American line, escaping only after taking heavy losses. Drummond, having taken a wound in the neck, was determined to retake the cannon and sent wave after wave of soldiers rushing up the hill. Ripley, who was soon hard-pressed to hold the position for much longer, sent word to Scott to ask for help; though Scott's brigade itself was badly mauled, having borne the brunt of the first stage of the battle, the big brigadier was not one to cower on the edge of a battlefield. Scott formed up what was left of his three battalions and marched them forward, past the captured guns – instead of simply reinforcing Ripley's position, he had decided to take the fight directly to the British line.

The British 89th regiment knelt in a grain field, awaiting Scott's advance. When the Americans were only 20 paces away, the British opened fire, sending scores of US soldiers crumpling to the ground. The Americans began to retreat with the regulars leaping up and chasing them. After another round of hand-to-hand fighting, the survivors of Scott's brigade made it back to the American line; Scott himself, gravely wounded in the left shoulder, was carried off the battlefield. So was General Brown, who had taken a musket ball to the thigh, leaving General Ripley in overall command. During this chaotic moment, Drummond ordered one final assault on the cannons that devolved into a savage, bloody melee. The British were ultimately forced back off the hill, as an eerie silence gripped the battlefield. It was close to midnight, and the Battle of Lundy's Lane was finally over. 853 Americans had fallen killed or wounded, compared to 878 British losses, making it the bloodiest battle of the war thus far.
Aftermath
In the immediate aftermath of the battle, the Americans claimed victory; they had, after all, retained control of the cemetery hill that had been the center of so much of the fighting. However, the American army was left in a precarious position. Not only were both Brown and Scott incapacitated from their wounds, but only about 700 US soldiers were left in fighting condition, with food and ammunition running dangerously low. Drummond, on the other hand, could afford to wait for reinforcements, giving the British the advantage.
On the morning of 26 July, Ripley – as the ranking US officer – decided not only to pull his men off the hill but to withdraw back to Fort Erie altogether. This infuriated Brown, as it robbed him of his claims of victory, yet Ripley considered the lives of his men more important than abstract concepts like honor and victory. The British, after licking their own wounds, would pursue, leading to the climactic Siege of Fort Erie (4 August to 21 September 1814); though Drummond would be unable to take the fort, the Americans would soon be forced to abandon it, bringing an inglorious end to their final invasion of Canada. The Battle of Lundy's Lane, therefore, was significant not only for being one of the bloodiest fights of the War of 1812 but also for depleting the US army so much that it was ultimately unable to continue its invasion.


